Tuesday, March 31, 2015

Get Outside Your Comfort Zone - Eclectic Ellapu

Big NEWS!!! >>> I am not the only one who didn't know how to do masking <<<. A couple of weeks ago, I featured the masking guru herself, Miss Laura Jane Head, on my blog and I had to CASE one of her cards. So I set out to learn how to mask. 

Honestly, I love the effects but it is a very time-intensive, perfection-required, un-Becca-like thing to do. (Hello, Damsel of DISTRESSED anyone?!)  

However, I got to choose the challenge theme over at Eclectic Ellapu this month and I have chosen:


We want to you try something you're not entirely comfy with. Something you haven't mastered yet. Get outside that space that makes you relax and get really really worried that your project is going to turn out like a Picasso print (except for not worth as much money). 


Which brings me back to masking. After seeing my CASE of Laura's card, my awesome, gorgeous, talented, amazing (have I thrown enough good adjectives out there yet) cousin asked me if I would show her how to mask. 

My first thought was, WHYYYYYYYyyyyyyyyYYyyyy?!?! Now I have to do that whole shindig all over again?!? Definitely outside my comfort zone! And my second thought was to sigh in resignation and start working on a masking tutorial. Since my cousin lives in North Carolina, that's the only way I can "show" her. 
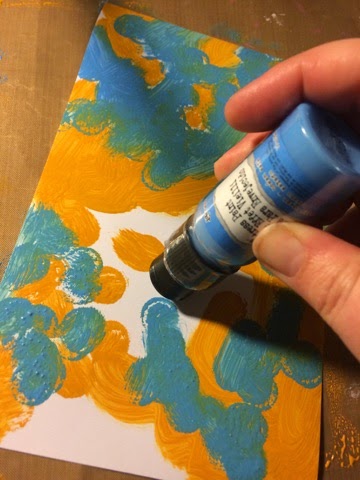
Step One:
The key to masking is to choose which things you want in the forefront and to stamp those images first. For example, I knew that I wanted a frame for my sentiment in the forefront, so I stamped that and then I stamped the image again on a piece of scrap paper and fussy cut it. 


Then I positioned my frame over the frame I'd already stamped on the card. 
TIP: If you use sticky back Post-Its, this is much easier. Since I haven't invested in those, however, I just used scratch paper. 

Step 2:
Stamp the next image you want. This image will be behind the foreground image. 


Repeat the process of stamping on a scratch piece of paper, fussy cutting it, and masking the stamped image already on your card. You can see that the area over the frame would have been ruined if I'd stamped directly onto my card. By masking, the frame is protected from any unwanted ink. 

Step 3 through 9,123
 (at least that's what it felt like in my head) 


Continue stamping and fussy cutting as needed. Remember that each layer you do will be BEHIND the images already stamped. For me, I was using the same stamp over and over again (From STAMPlorations Bloom Sketches). Because of this, I was able to use the masks I'd cut and move them along my design as I went, so I really only had to cut out the two daisy masks. 


I colored my daisies all in with some BRIGHT neon Spectrum Noir markers, stamped a sentiment from STAMPlorations SENTIMENT BUILDERS: Celebrate and...

VOILA!


I've got an incredibly bright, fun springtime card. It was super fun to do something outside of my normal wheelhouse, AND it's sort of doubly outside my wheelhouse because you will notice that it is only >>>ONE<<< layer!! Unheard of. I painted in the centers of the daisies with perfect pearls for extra shine. 

What new thing can you add to your bag of tricks? Or what old thing can you give a second chance? Show us over at Eclectic Ellapu!

As for me, I will be linking up to these incredibly cool challenges:
Inkspirational - Neon Colours 
Sentimental Sundays - Spring plus a sentiment
Pile it On - Easter/Springtime
Corrosive Challenges - Hop into Spring
613 Avenue Create - Anything Goes


Thank you for stopping by and a HUGE CRAFTY THANK YOU to my newest followers! Follow my blog or leave me a comment and I will try to return the favor! 

Tissue Paper, Gelatos, and Stars - Oh MY! Cardz 4 Guyz GD

Holy flibbertigibbets (which I learned this week IS an ACTUAL word... thanks to what I am assuming is a dictionary editor who got a little tipsy one day)! Have I ever got a textural card for you!!

Well... not literally for you... It's actually for my card stash. But that's not the point. The point is that I'm going to SHOW you a textural card.

This week also marks the last Tuesday of March, which means my Guest Design team with Cardz 4 Guyz is coming to an end. *Insert sad face here* I've so enjoyed thinking about the guy-side of things this month because I so often forget to do that!

The challenge over at Cardz is to use something that starts with an "S". 


Hence: A STAR!!


Whenever I get an order from STAMPlorations, Shery always wraps the stamps in tissue paper. Since I am a weirdo hoarder of all things that could potentially be stuck on a card at some point in time, I have a stack of tissue paper just lazing about unused in my craft room. 


Here's how I made my background:


I began by painting my card stock with a thin layer of Matte Gel and then stuck some crinkled up tissue paper to it. I then painted over it with another layer of Matte Gel and let it dry. Then, because I wanted to use gelatos and didn't want my tissue paper to tear, I painted over the whole thing with gesso. 

Then I applied alternating diagonal rows of bright blue and bright green Gelatos to the base and blended with my finger and some water. 


 Next, I applied some blue ink through a swirly stencil (STAMPlorations Confetti Circles) and then moved the stencil to a different area and applied texture paste. Then I let that dry. (Oh pssssh, yeah right - I totally used my heat gun to speed up the process.)

I sponged the edges and raised areas of the background with Black Soot Distress Ink to really bring out the great texture, and to grunge it up a bit. I added a star from a die cut pack and placed it behind some teal baker's twine. Then I added the In a Word: Happy die from Winnie and Walter and stamped birthday onto the star. 


This is definitely a technique I'll be trying again, because I am in L-O-V-E with all that texture and drama. 

So if you are thinking of the Fellas this week in your card making, put something with an S on it and go play along at Cardz 4 Guyz!

I'm also sending my card over to the following challenges:

Seize the Birthday - Anything Goes Birthday

Addicted to Stamps - Stars
Through the Craft Room Door - Anything Goes
Little Red Wagon - You're a Star
Friday Mashup - Sketch or Masculine project

Thanks for stopping by! Follow my blog or leave me a comment and I'll try to return the favor! Happy Tuesday!

Thursday, March 26, 2015

Mixed Media Cards with a Gelatos Collage Tutorial


I have a new favorite love and her name is Gelatos. Today, I'm going to show you a collage technique tutorial using Faber Castell's Gelatos. I will say up front that my card is heavily inspired by a video I watched from Nadia Cannizzo


I've seen amazing cards done with Gelatos but I have never used them before. A couple of weeks ago, I picked up four sticks to try them out and the verdict is: 

I am going to go broke. Sigh*

I made this card for the crafty Christi Conley because she was my
March Card Chain Challenge recipient. If you want to sign up to receive a card from another crafter in the blogosphere, check out the Society of Stampaholic's Card Chain Challenge!

Step One:

Prep you paper by applying a thin layer of Gesso


Why? Because if you don't, it will make it harder to blend. You technically don't have to use the gesso, but if you don't, you'll have to apply a lot more of the Gelatos.

Step Two: 

Scribble on a small amount of the Gelatos. 
I am using pink and purple shades.


Blend with your fingertips. Dip them in a little bit of water as you go along to make blending easier. 
Just so you all can see the difference, the sheet on the left was when I tried to blend an un-gessoed piece of paper. The right is with the gesso. 

After I had a good blend, I used a baby wipe to remove some of the Gelatos in areas for more visual interest. 

Step Three:

Stamp some images on the piece of the paper and
 then cut into small pieces. 


Step Four: 

Create a base for your card. I gessoed a piece of card stock and then scraped a Distress Ink Pad (Scattered Straw) directly over the top. 


I like the look of this vs. sponging because it creates a distressed, shabby look. 

Step Five:

Use glue to adhere your collage pieces to the base, 
alternating directions and stacking.
Then outline the squares with Gelato and blend with your finger. 

I used a combination of pink and purple and blended some color into the base, too. 
Right is during the process and left is the finished product. 

Step Six: 

Add your other pieces


As you can see - I made two cards! I loved the look of this so much, I had to keep playing. The gorgeous sentiments are both from STAMPlorations Blossom Overture set.

I am going to send my cards over to the following challenges: 
Mixed Media World - Anything Goes
Simon Says Wednesday - Anything Goes
Hiding in my Craft Room - Anything Goes

Thank you for stopping by! Leave me a comment or follow my blog and I will try to return the favor!


Wednesday, March 25, 2015

My Very First Art Journal Page!! - Crafty Gals Corner Anything Goes

Last month I attended a craft fair down in Fargo, ND, called Unglued. It's a juried fair, meaning you have to apply to be in the show. They receive over 200 applicants every year and only accept about 60. I went because I'm going to apply next year. Gulp!

Let me just say that there were some AMAZING crafters there. I stumbled across this one booth that was selling old books that had been rehabbed into art journals. I drooled, and I paused, and then I bought one!


I loved the retro design and the fact that it was taking old books and giving them new life. That book has been sitting on my shelf and I've been so intimidated to open it. I'm fairly comfortable with cardmaking, but I wasn't so sure how I would like art journaling. Or if I would be good at it. 

Since it is Anything Goes week over at Crafty Gals Corner, I decided to give it a whirl. I've always had this idea to give some of the poetry that I write imagery to go along with it, and I finally took the leap. 

Turns out, art journaling is a TON of fun and, to me at least, a little bit less pressure than making a perfect card. 

My poem is about winter and so I chose to work with this gorgeously wistful digital stamp from Stitchybear Digi Outlet called Poinsettia Fairy

I printed her really big and it took me about two hours to color the whole thing in with my Spectrum Noir Markers. Whew!


After I colored the image, I sprayed my pages with Distress Spray Stains (Evergreen Bough, Festive Berries, Peeled Paint). 


I swooshed the ink around with my paper towel to create some diagonal lines and then I added embossing paste through a Wendy Vecchi Polka Dotty stencil and some Swirly stamping. 


I wrote my poem on a piece of paper, 


I distressed the edges and sponged with Vintage photo before I adhered my fairy using gel medium. 


I really like how this turned out and I liked how freeing the whole process was. I'm definitely going to be doing this with my other poems and I can't wait! 

Again - you can link up ANY project using ANY type of stamp over at Crafty Gals Corner this week. And we have prizes to sweeten the deal! :) 


Prize: $20 Gift Certificate

AND


Prize: $10 Gift Certificate

As for me, I'm going to link my very first art journal page up to the following awesome challenges: 
Addicted to Stamps and More - Make your Mark
Mixed Media World - Anything Goes Mixed Media
Inkspirational - She Art or Image of a Woman (sidebar - seriously go look at this link-up gallery! It's amazing!)
D.L. Art - Anything Goes
Simon Says Stamp Wednesday -Anything Goes featuring Spectrum Noir


Thanks for popping by and a big welcome to my new bloggy followers! I look forward to getting to know you and your art better! 

Leave me a comment or follow my blog and I'll definitely try to return the favor!

Tuesday, March 24, 2015

Faux Metal Background Distress Paints Tutorial - Cardz 4 Guyz Guest Designer

As many of you may already know, my good-deal loving self picked up an entire cart load of Distress Paints when they were on clearance at Michael's a couple of months ago. Aaaaand then about a month later I got a 30 percent off deal at my local craft store for Distress Stains. What was a girl to do, but to add those to the collection, too? Today I'm going to share a technique tutorial that resulted from a very messy experiment session. 

P.S. (yes I know that means POST script, but I'm a rebel) I would warn you that this is a picture heavy posting, but A) I don't believe in warning people - it's better that they find out what they've gotten themselves into after they're too far sucked in (that's how I've gotten all my boyfriends) and B) Who doesn't like pictures? 


Anywho, I've used my new crafty products once or twice, but mostly they've been woefully staring at me from their mesh bag home. In an effort to remind myself to use them more, I've given them a new, shiny home and plopped them right on my crafting table. 


That storage holder thing-a-ma-bob is actually a spice rack that I purchased at a garage sale for a paltry $5. Woot! So now you know, A spice rack holds spray stains perfectly and Distress Paints perfectly! 

Now back to the card. I'm guest designing over at Cardz 4 Guyz this month and the theme this week is transportation. I have these old trucks from the Tim Holtz "Enjoy the Journey" set and thought I'd create a background to compliment them. 


Step One:

 Dab a bunch of Salty Ocean and Wild Honey Distress Paints 
on a piece of cardstock:


Step Two: 

Make sure layer one is completely dry (you can speed this along with a heat gun) and then apply Tarnished Bronze Distress Paint over the top. Use an flat object to scrape the paint in a thin layer (I used the edge of an acrylic block, but you could use a spatula or a credit card, or even a thick piece of cardstock). 


You can scrape the paint side to side in areas and up and down in other areas for added visual interest. You can also add dabbed areas on top (see right picture) for more texture. It's ok if bits of the first layer show through! 

PAUSE!


At this point your background will look a lil' something like this. You can just stop here and you'll have that aged metal effect. But I wanted a little more texture, so I added a couple more steps.

Step 3:

(optional)
Add an embossing powder for more texture


While the paint was still wet, I selectively added an embossing powder called Rusted Metal (it's really old, so I can't tell you where I got it) and then heat dried. 

Step 4:

Spray it all over with Black Soot Distress Spray Stain


Let it sit for a second or two, and then dab up excess with a paper towel. And then you will have....


An amazingly textural background that looks like oxidized metal!

Now the real question was what to do with it. I opted to use an NBUS Embossing Folder that my Design Team Coordinator, Samantha Aguilera sent to me. (Big thanks!)


I stamped an old truck using a three part process. First in Wild Honey Distress Inks, then in Evergreen Bough, then in embossing with the same Rusted Metal powder. I also used some chipboard and added embossing powder and Salty Ocean Distress Paint to the edges to achieve that oxidized effect again. 


For not being a guy cardmaker, I really loved the way this turned out and want to super thank Cardz 4 Guyz for reminding me that boy cards can be tons of fun, too!


I'm also going to link my card up to the following challenges:
Mixed Media World - Anything Goes
Craft Stamper Magazine - Use a Stamp
NBUS Challenge (because Darnell is the BEST!)
Through the Craft Room Door - Anything Goes
Retro Sketches - Thanks for the great sketch!

Whew! Well you got through all the pictures. Thank you for coming over and for sticking with me! And you should totally check out Cardz 4 Guyz, too!!! 


Sunday, March 22, 2015

Stencils and Embossing Powder - CCC and NBUS

Whew! Something about traveling takes the wind right out of me. This week I had to give a grant writing presentation to city officials down in our state capital, Bismarck. Talk about nerve wracking! To top it all off, I was co-presenting with the Director of my Center. Double whew!

So that's why things have been a little quiet on the Becca front this week. Today I'm back to share a card that I made for the March Card Chain Challenge over at Society of Stampaholics. What is the CCC? I'm glad you asked! 

The CCC is Deborah Nolan's brainchild. It's a monthly card exchange of sorts. Basically you sign up to send a card, and you also get a card. It's a ton of fun and a great way to actually use those pretty cards you make. 
Today I'm going to talk about using stencils and embossing powder to achieve a great distressed effect. 

To make the panel for my card, I started by rubbing the background with some lighter shades of Distress Inks (Tattered Rose, Spun Sugar, and Stormy Sky). 


Many people just use stencils with inks, but there are so many ways to use them! A couple weeks ago, I did a series of tutorials showcasing stencils and embossing paste, distress paints, and spray stains. 

Using stencils with embossing powder is very similar to using stencils with inks. Rather than using ink, however, all you have to do is sponge with an embossing ink (I used Perfect Medium, which is a thicker ink that works well with Perfect Pearls). 


This stencil is a sticky back one that came along with a brand new set that I just got from Hampton Art. I was dubious at first about how the sticky back would work on paper, but it was AMAZING! I didn't have to worry about taping the stencil down to hold it in place and it peeled right off with no problems!


Anywho - I sponged the embossing ink through the stencil and used a gold powder. Before drying, I brushed some areas off to give it more of a distressed look. I embossed a bird on a piece of turquoise vellum and then added some pink flowers sand twine. Lastly I sprayed the background with Distress Spray Stains and put all the layers together: 


This card was sent to the amazingly talented Robyn Oliver in Australia. 

Speaking of cards, I received a gorgeous one in the CCC from Mynette Kitchen that I want to share with you all! 

Mynn Kitchen

Let's just say that one is VERY proudly displayed in my house! Gorgeous! 

HEY! Have you heard?! The NBUS challenge is now open for business (or pleasure)! What is NBUS? I'm glad you asked! NBUS is an acronym for never-been-used-schtuff and is the brainchild of the amazingly hilarious and warm Darnell Knauss of DJKardKreations. So pull out your unused stuff that needs some love and get playing already!!


I am also going to link up the following great challenges:
Simon Says Stamps Monday - Lions and Lambs Oh My (use animals)
Addicted to Stamps and More - Anything Goes
Little Red Wagon - All tied up (used twine)
Hiding in My Craft Room - Embossing